Using a schema, you can change the column names, order, and visibility in most grids in the Manage tab.
When you move add new or remove columns, use column filters, or placement of table columns in the Visual Planning interface, you change the configuration (or "schema") of the working area. Schema functionality is available across all the sub tabs on the Manage tab and in many other user grids.
Adding a schema
You can add one or more schemas to serve different purposes. For example, you may want to have a different views of project information. Each view is configured with a separate schema. For example, you may want to have two different views: one for viewing projects by project manager and another for viewing projects by office and organization.
Follow these steps to create a schema:
- On the Manage tab, click
 to display the Add New Schema popup window.
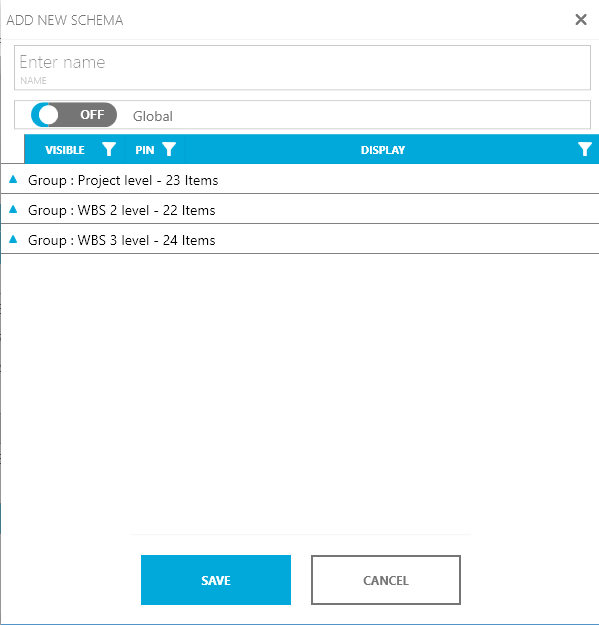
- Enter a name for your schema.
- If a user has permission, toggle Global to ON so that this schema to be used globally by all of your teams. If Global is OFF, the schema is only available to you.
- Click the a group heading to expand and choose the fields to appear in the schema.
- If a check appears in the Visible column, that field will appear in the schema.
- Double-click on a field name to edit the display name for the field.
- Click the Save button at the bottom of the popup window to save your new schema.
Editing an existing schema
You can edit an existing schema to select or deselect fields and columns to match your requirements.
Follow these steps to edit an existing schema:
- On the Manage toolbar, click
 to display the Edit Schema popup window.
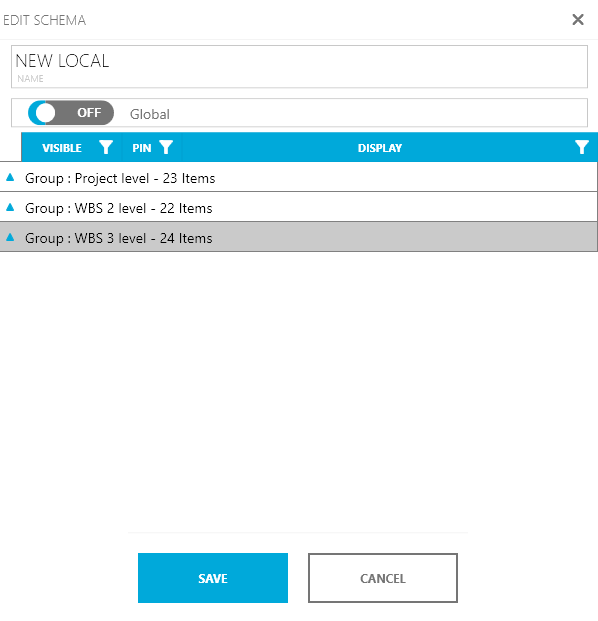
- Optionally, you can change any of the following.
- Edit the name for your schema.
- If a user has permission, change the toggle to either ON or OFF. Set Global to ON so that this schema to be used globally by all of your teams. If Global is OFF, the schema is only available to you.
- Click the a group heading to expand and choose the fields to appear in the schema.
- If a check appears in the Visible column, that field will appear in the schema.
- Double-click on a field name to edit the display name for the field.
- Click the Save button at the bottom of the popup window to save your new schema.
Reloading an existing schema
You can return the work area to the saved configuration of the layout. For example, if you are working in a particular layout and have opened different interface elements or moved interface elements around, you can select this option to go back to the saved configuration.
- On the Manage toolbar, click the
 sign to display a list of existing schemas.
 - Click the schema name that you want to reload onto the work area.
Deleting an existing schema
You can delete an existing schema using the delete button.
| NOTE: Deleting a scheme will not delete any data or project information. |
Follow these steps:
- Select the schema that you want to delete.
- From the Manage toolbar, click
 . A warning popup window will appear.
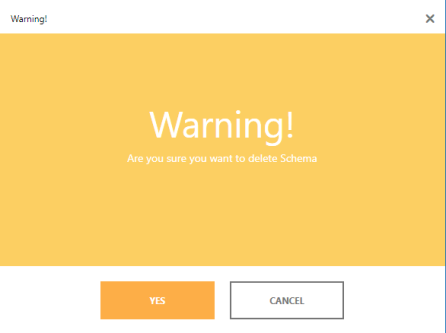
- To delete the selected schema, click Yes. The Default schema will load into the work area.
Global vs Local schemas
A global schema allows you to set up a layout/view that can be used across the organization by everyone. Any user in the organization can create, edit, and delete a local schema on their computer.
| NOTE: Only users with the specific permissions can create, edit and delete global schemas. |
|
TIP: Use the same steps as adding a new schema. The Global option will be disabled if you do not have the permission to set a global schema. |
- On the Manage tab, from the toolbar, click to display the Add New Schema popup window.
- Enter a name for your schema.
- If you want this schema to be used globally across/by all your teams, toggle the Global option.
- Click the relevant group to select individual or multiple fields.
- To display a particular field, tick the Visible option for that field.
- You can manually change the name of the display.
- Click Save to save your new schema.